Back to all projects


 61173923
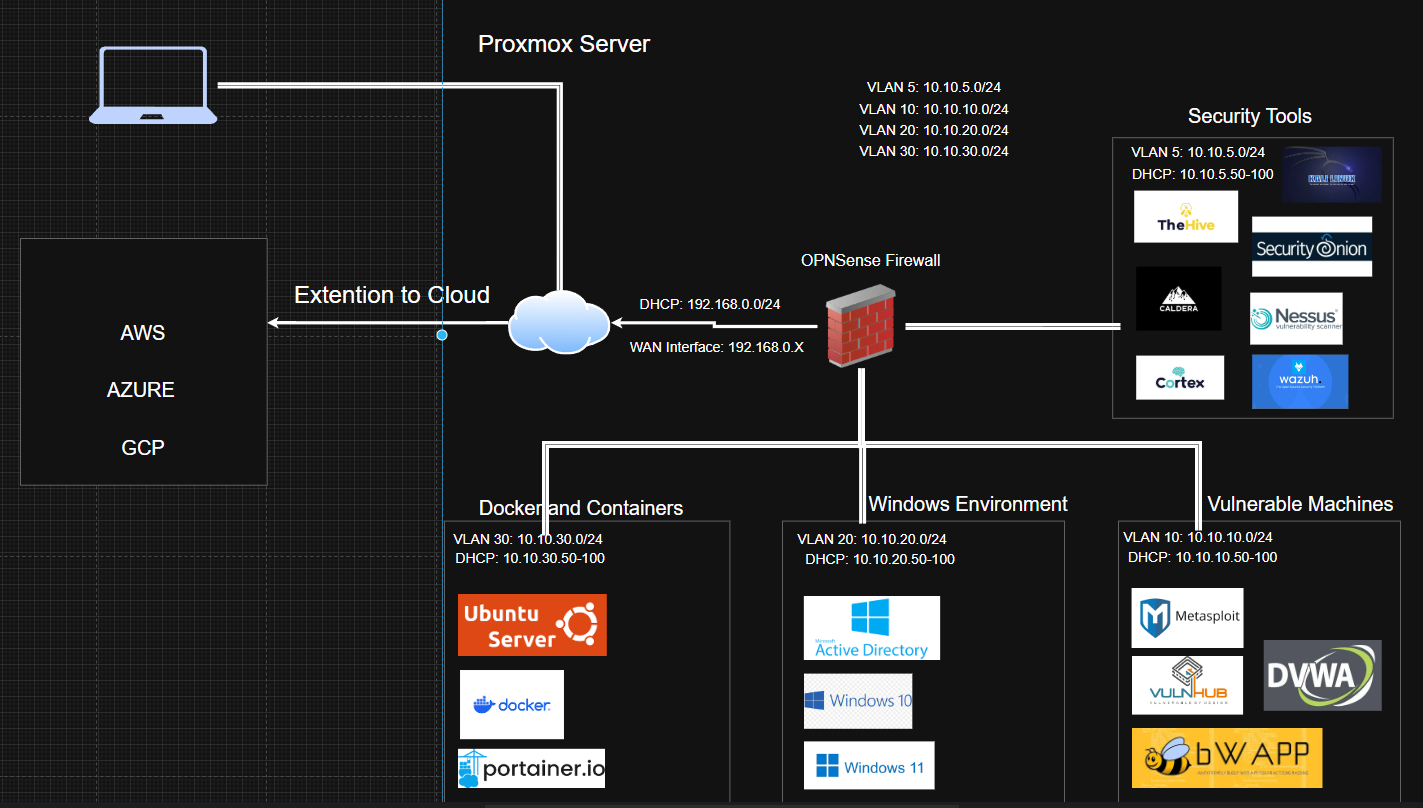
Segmenting My Cybersecurity Homelab Using VLANs
2025-06-29
Samson Otori
Personal Project
Infrastructure
Project Gallery
VLAN
Network Segmentation
OPNsense
Cisco Switch
Proxmox
Infrastructure
Homelab
Continue Reading
PreviousProject 4.2: Ubuntu Server, Docker and Portainer Installation · Part 1 of 1
Ubuntu Server, Docker and Portainer Installation in My Homelab
A detailed walkthrough of deploying Ubuntu Server with Docker and Portainer in my segmented cybersecurity homelab, including remote SSH man…
Jul 3, 2025
Read previous
NextProject 4: Building a Full Hardware Cybersecurity Home Lab · Part 1 of 1
Building a Full Hardware Cybersecurity Home Lab
A comprehensive guide on transitioning from VirtualBox to building a fully equipped hardware cybersecurity home lab, complete with network …
May 15, 2025
Read next
Related Projects

Oldest Projects

Newest Projects
Blue Team
Project 6.4: Agent-Based Vulnerability Monitoring on Linux with Tenable Nessus Agent
Dec 5Project
Blue Team
Project 6.3: Agent-Based Monitoring on Windows 11 Using Tenable Nessus Agents
Nov 28Project
Blue Team
Project 6.2: LOG(N) Pacific Internship – Windows 11 Compliance Scanning Using a Custom Tenable Scan Template
Nov 25Project
Project Categories
All
Cloud
Blue Team
Red Team
Infrastructure